
Activate ChatGPT to Airtable after purchase
Verify your purchase email and unlock batch sync and automatic backups in the extension.
After purchasing ChatGPT to Airtable, verify the email address used at checkout to unlock subscription features.
1. Open Subscription Status
Open the extension options page and scroll to Subscription Status. The section shows Not subscribed until your purchase is verified. From the workspace header, you can also click the crown/Subscription icon to jump to this section.
2. Verify your purchase email
Enter the exact email address used during checkout, then click Verify. The extension checks the subscription and updates the status when the purchase is found.
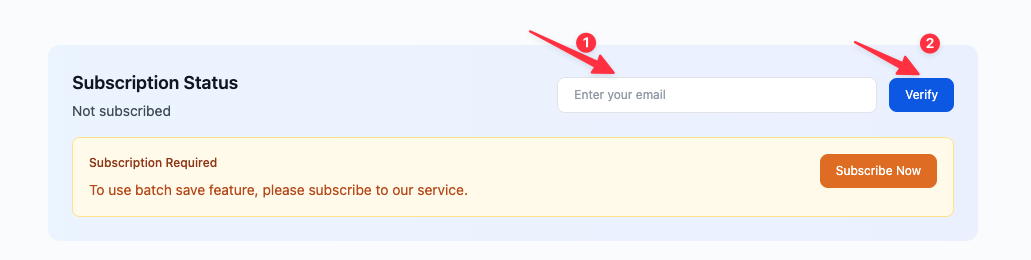
Use the same spelling and email provider as your receipt. A different address—even one that forwards to the same inbox—may not match the purchase record.
3. Turn on automatic sync (optional)
Once the status is Subscribed, return to the workspace header and click Auto sync off to enable automatic backups. The button changes to Auto sync on when the setting is active.
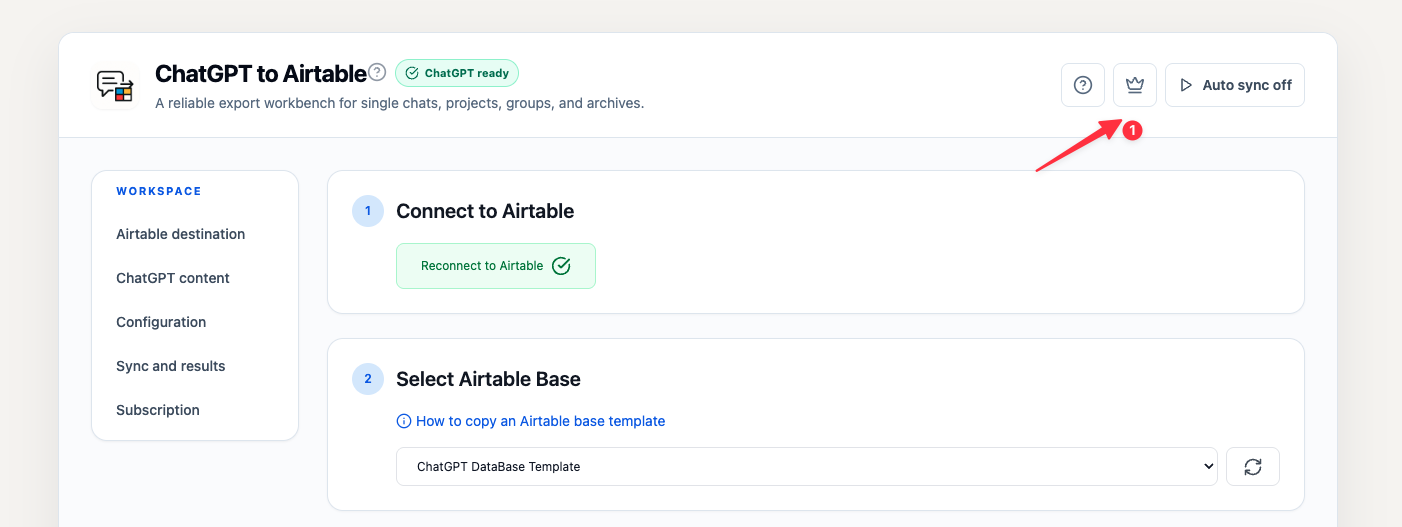
Configure the sync interval and other behavior in the extension’s configuration section. You can turn automatic sync off at any time from the same header control.
4. Connect Airtable separately
Activation only unlocks paid features; it does not choose an Airtable destination for you. Complete Connect Airtable, select a base and table, and save a test conversation before enabling a large batch.
If you still need a subscription, see the ChatGPT to Airtable pricing page.
Troubleshooting verification
- Confirm that the email matches the checkout receipt exactly.
- Click Verify again after correcting the address, then refresh the options page.
- If the status remains Not subscribed, contact support with your purchase email and receipt details.
Ready to try Chatgpt To Airtable?
Open the product page for feature details, screenshots, pricing, and the Chrome Web Store install link.